This guide provides step-by-step instructions on preparing child records for billing and subsidy reconciliation.
For additional assistance with financial processing, return to How-To Guides and select an option under Billing Guides.
Review/Update Child Roster
The first step of this process is to review your active child roster to ensure all active children are billed. This process includes adding newly enrolled children and discharging/transferring children who are no longer enrolled. Click here for a review on updating your active child roster.
Review Your Billing List
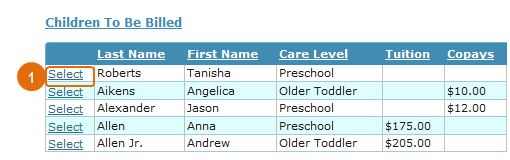
Next, you should review the list of children to be billed.
1. Navigate to Family Billing on the Billing Menu.

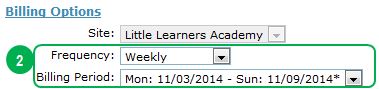
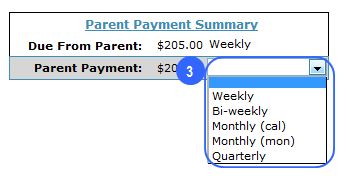
2. Select the billing frequency and billing period when you plan to begin billing in ChildWare.

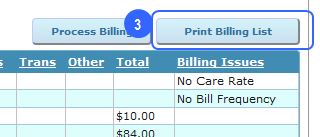
3. Click “Print Billing List”.

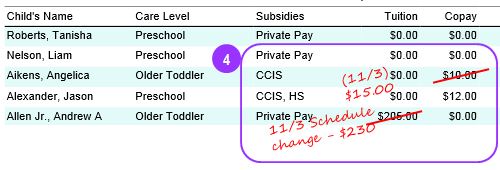
4. Review each child’s funding sources and expected charges and jot down notes for any necessary changes. Be sure to include effective dates.

If you have children with different bill frequencies (weekly, monthly, etc.), repeat steps 2 – 4 for each frequency.
Service Profile Updates
After reviewing the billing list and notating changes in service for specific children, you will begin updating each child’s service profile. Typical updates include incomplete service profiles and children with a change in funding source, co-pay amount, schedule, care level or frequency.
Incomplete Service Profiles
Children with incomplete service profiles are easy to identify on your billing list. They appear at the top of the list and include a notation about what data is missing in the ‘Billing Issues’ column of the grid.
No Care Rate
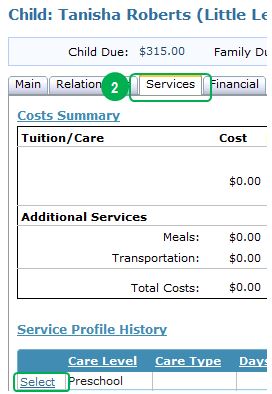
1. If the billing issue listed is ‘No Care Rate’, this indicates that no tuition rate has been selected. Select that child’s record.

2. Navigate to the services tab, then select the service profile.

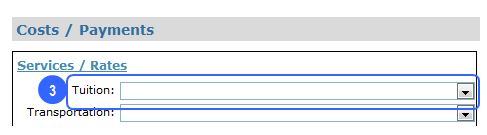
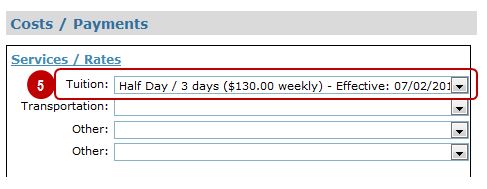
3. Scroll down to the Costs/Payments section. The tuition or care rate is missing from this profile. Regardless of the funding source, each child must have a care rate assigned, as this indicates the cost of care. Even children with subsidies must have a care rate assignment.
At least one tuition rate should be available to select from the drop-down list. If no options appear, this indicates that you have selected a mismatched care rate, care type or schedule.

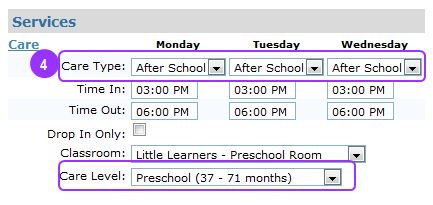
4. Scroll up to the Services section of the service profile. Review the child’s schedule and care level. In this example, After School + Preschool is not a service that this center provides. After School programming is only available for School Age children. Update the care type for each day.

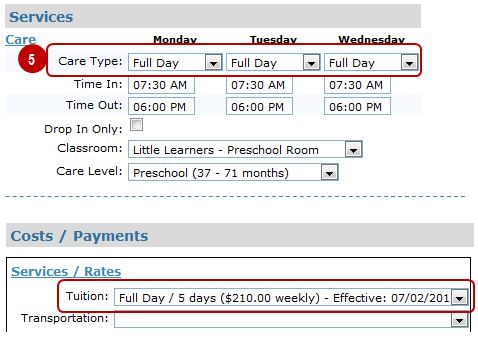
5. After updating the care type / schedule, the tuition rate displays in the Costs/Payments section.*

*If you believe you have the correct care level + care type + number of days scheduled and there is still no tuition rate, contact childware@phmc.org. You may need to provide additional information for your site setup.
No Bill Frequency
1. If the billing issue listed is ‘No Bill Frequency’, this indicates that no bill frequency has been selected. Select that child’s record.

2. Navigate to the services tab, then select the service profile.
3. Scroll down to the Costs / Payments section and select a billing frequency from the drop-down.

Remember to scroll back to the top and click ‘Ok’ to save.
Schedule/Care Changes
A child’s schedule, age and funding source affect the amount to be billed to parent.
1. Select the child’s record.

2. Navigate to the services tab, then select the service profile.
The Services Section of the service profile includes the child’s schedule and care level.
3. The schedule can be changed by selecting a different care type from the drop-down for each day. If the child is not scheduled for a day, click the blank space above the first care type on the drop-down.
4. The care level can also be changed by selecting a new care level from the drop-down.

5. When the schedule or care level of the child has changed, a new tuition rate will populate in the Cost/Payments section of the profile.

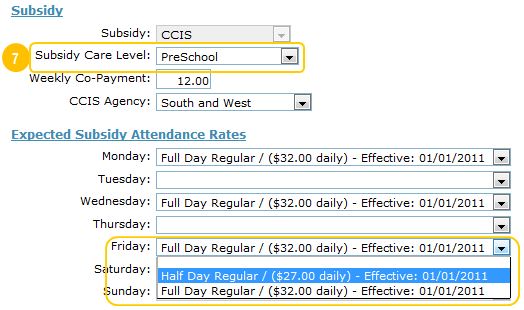
6. If the child has a schedule or care level change and also has subsidy funding, select the subsidy record under the Subsidies/Scholarships section of the profile.

7. Update the care level or subsidy reimbursement schedule as needed.*

*The subsidy schedule cannot include days that are not listed on the main schedule of the service profile. If you are updating a profile to include less service days than the original profile, update the subsidy schedule first, then the main schedule located under Services on the service profile.
Discounts and Partial Tuition
Discounts
Private Pay families may receive discounts on their recurring charges. To add or update a discount, scroll down to the Costs/Payments section of the service profile.
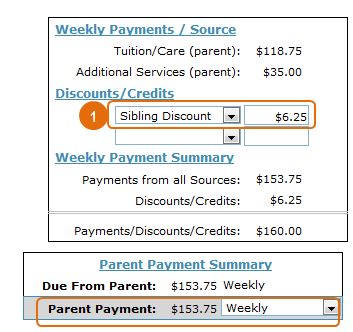
1. Select a discount from the drop-down menu. The amount will load as a flat rate, or will be calculated based on a percentage.* The discount will be reflected in the final parent payment schedule.

*Discounts are setup during the account setup process. If additional discount setup is needed, contact childware@phmc.org.
Partial Tuition
Partial tuition, sometimes referred to as ‘wrap around care’ can be applied to children with subsidy. To add or update partial tuition, scroll down to the Subsidies/Scholarships section of the service profile.
1. Check to make sure a subsidy record is listed on the profile. See Funding Source Changes.
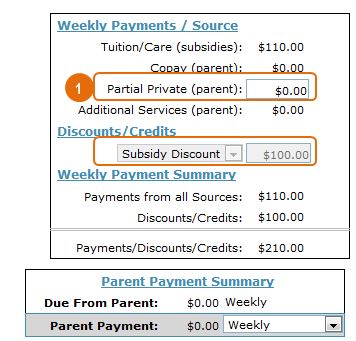
2. Under the Costs/Payments section, you will see two fields: Partial Private (parent) and Subsidy Discount.

Based on your account setup, the system will default to:
- Charging the difference between private pay rates and subsidy reimbursement; OR
- Applying a subsidy discount which is the difference between subsidy reimbursement and your private pay rate.
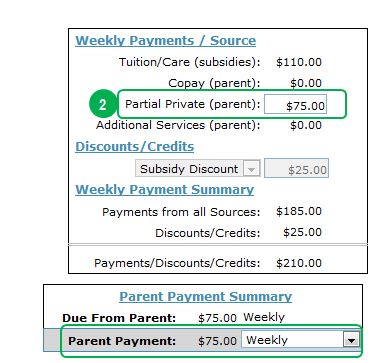
2. You can manually edit these fields by updating the amount in the Partial Private (parent) section. The final parent payment schedule will reflect this change.

Additional Services
You can also include additional recurring charges include meals, transportation and other custom charges.
Like tuition rates, a change in meal or transportation schedule will provide you with different options in the Costs/Payments section.
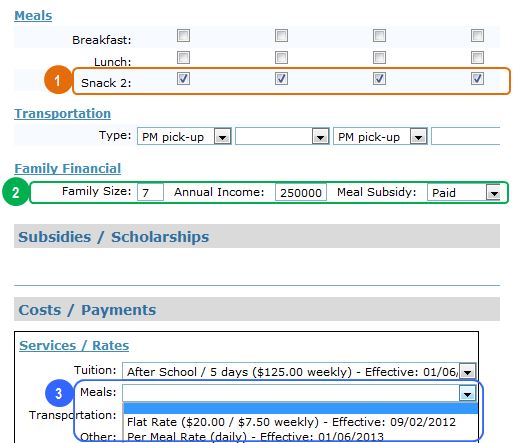
Meals
1. Update the expected meal schedule for the week.
2. Specify the meal subsidy status. If you enter the family size and annual income the meal subsidy status will prepopulate based on federal poverty guidelines.
3. Select the meal rate that applies to this child.

4. The meal rate selected will display as additional services charged to the parent under Weekly Payments/Source.

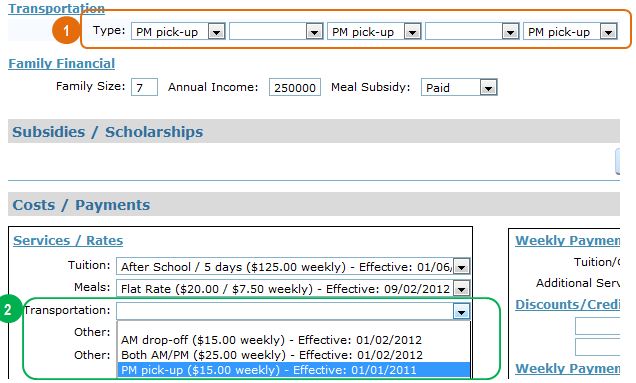
Transportation
1. Select the transportation schedule by selecting a type for each day of service.
2. Select the appropriate transportation charge.

3. The transportation rate selected will display as additional services charged to the parent under Weekly Payments/Source.

Funding Source Changes
1. Select the child’s record.

2. Navigate to the services tab, then select the service profile.
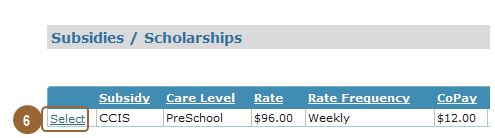
Scroll down the Subsidies/Scholarships section of the profile.
3. To update a copay, select the subsidy record and override the current copay amount listed.
4. To add a new subsidy to the profile, click ‘Add Subsidy / Scholarship.’
5. To delete a subsidy from the profile, click ‘Delete’.

Adding Opening Balances
On the date you begin billing in ChildWare, it is likely that some families will be carrying a balance. Opening balances can be added manually to each account, or can be input using the Batch Payments/Credits and Batch Charges feature.
1. Select the child’s record.
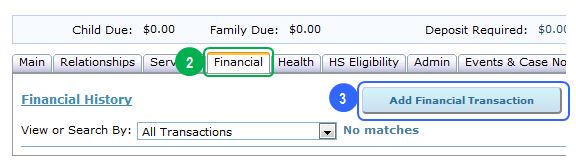
2. Navigate to the financial tab.
3. Click ‘Add Financial Transaction’.

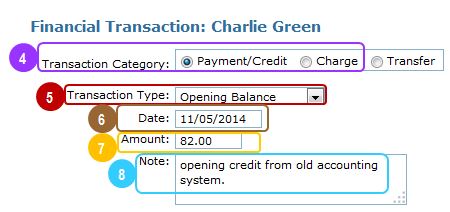
4. For opening credit balances, select payment/credit. For opening outstanding balances select charges.
5. Select ‘Opening Balance’ as the transaction type.
6. Enter the date of the opening balance. This should be the date before you begin tracking financials and billing in ChildWare.
7. Enter the amount of the balance.
8. Enter a note about the balance transfer.

Remember to click ‘Ok’ to save the record.
The balance will be added to the child’s financial record and be reflected in the child and family balance.

Repeat for all children with an opening balance. Remember, financial records can be added in bulk utilizing the Batch Payments/Credits and Batch Charges features.
Final Review
Now that you have completed your updates you will want to complete a final review of child records.
1. Navigate to Family Billing on the Billing Menu.
2. Select the billing frequency and billing period you will be running.
You can review the billing list directly on your screen, or you can print the billing list by clicking ‘Print Billing List’.

Repeat for each frequency.


 On the “Events” Tab, fill in the event information and select the date to be reminded to follow up on this event.
 You can include information about what exactly needs to be completed.
 Select the staff member who should be reminded to follow up. This could be you or you can assign it to another staff member. The dropdown list will only include staff that have system user accounts in ChildWare.
 Check this box if you want ChildWare to send an email reminder to the user specified in Step 3. The email will be sent to the address listed on the staff member’s user account.
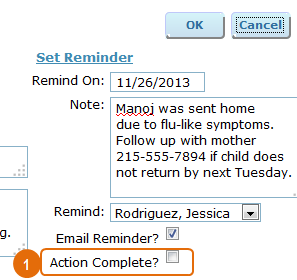


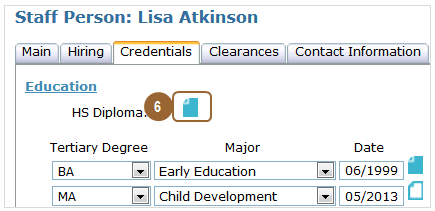
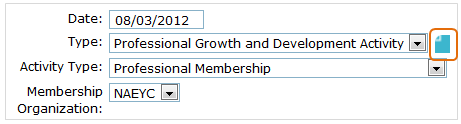
 This icon indicates that a document has been uploaded. Clicking this icon opens the document.
 This icon indicates that no document is uploaded. Clicking this icon allows you to upload a document.


 To view an individual document, click ‘Select’ beside the document you want to view.
 You can also choose to view all the documents in a single PDF file by clicking ‘View All Documents’. This is useful in cases where you need the same document for multiple staff or children – e.g. if you want to print all staff health assessments.