The Document Management System allows you to store PDF files associated with child, contact, and staff records in ChildWare.
Document types include but are not limited to health assessment forms, transcripts, and clearances.
ChildWare allows you quick and easy access to files through individual staff and child records, or from the Document Center.
1. Document Fields
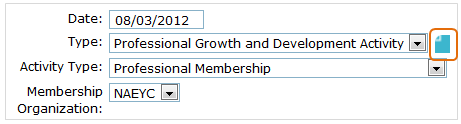
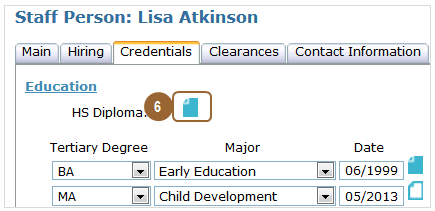
All documents uploaded to ChildWare must be associated with a specific field. Most fields for which a document can be uploaded will have an icon.

 This icon indicates that a document has been uploaded. Clicking this icon opens the document.
 This icon indicates that no document is uploaded. Clicking this icon allows you to upload a document.
Child Health Assessments, Child Events, Staff Trainings, and Staff PD events can all have documents associated with them. However, because they are listed in grids they do not have icons.
For these types of documents, you have to click ‘Select’ in the grid order to see if a document has been uploaded to ChildWare.

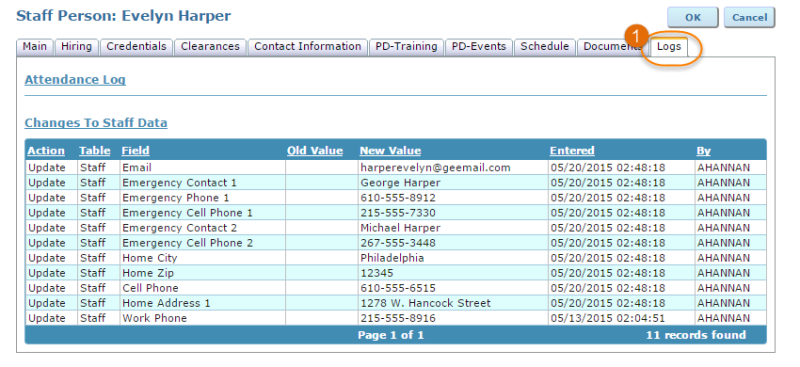
2. Documents Tab
Child, contact, and staff records include a Documents Tab which lists all the documents uploaded for that child or staff member.
From this tab, you can view, print, add, and delete documents. You can also print a list of documents available for that child, contact, or staff member, or you can search to find the specific document you want.

3. Document Center
The Document Center provides centralized access to all child and staff files. From this screen, you can do detailed searches and find, print, or view multiple staff and child documents at once. The Document Center is accessible under “Reports/Documents” on the Main Menu.

4. Viewing and Printing Documents
Regardless of how you access them, all documents will open up in a new window or tab. If nothing happens when you click the icon, you might have to disable your pop-up blocker. Click here for information on how to disable the pop-up blocker

4.a. Viewing & Printing Documents by Field
The quickest and simplest way to view a document is from the actual field within the child or staff record.
This icon indicates that a document is available for viewing. To view the document, just click the icon.
Remember that Child Health Assessments, Child Events, Staff Trainings, and Staff PD events can all have documents associated with them but that these icons will not show because these documents are listed in grids. To see if there is a document available for viewing, click ‘Select’ in the grid to see the icon then proceed as outlined above.
4.b. Viewing & Printing Documents from the Documents Tab

 Click ‘Select’ beside the document you want to view.

 On the Document Screen, click ‘View Document’ to open it.

If the child or staff person has many documents in their record, you may find it useful to limit the document list to certain types of documents. To do this:
 Select ‘Document Type’ from the ‘View or Search By’ drop-down; then,
 Select the appropriate document type from the ‘Search For’ drop-down list.
4.c. Viewing & Printing Documents from the Document Center
By default, the Document Center will not list any documents. To view available documents, you will need to provide some details on the documents you are searching for.
 First, indicate whether you want to view staff or child documents
When viewing child documents, you can filter by document type or classroom, or you can look up all the documents for a specific child. You can also filter by the dates that the child was active or by their enrollment date.

When viewing staff documents, you can filter by document type, staff title (e.g. all Assistant Teacher documents), program staff vs. administrative staff, site-based vs. agency-wide staff, or look up all documents for a specific staff member. You can also filter based on their hire date or look for documents related to trainings or events that took place within a specific date range.
Once you have selected search parameters for the documents you want to view, click ‘Search Documents’.

A list of all documents that meet your specified parameters will be displayed.
 To view an individual document, click ‘Select’ beside the document you want to view.
 You can also choose to view all the documents in a single PDF file by clicking ‘View All Documents’. This is useful in cases where you need the same document for multiple staff or children – e.g. if you want to print all staff health assessments.
5. Uploading Documents
5.a. Uploading Documents by Field
 To add a document, click on the icon beside the associated field. You will be taken to the document upload screen.

Click ‘Browse’ to find the document you want to upload on your computer.

Select the document you want to upload,
Then click ‘Open’. You will be taken back to the document upload screen.
 Now the name of the document will be displayed beside the ‘Browse’ button. Verify that this is the document you meant to upload and click ‘OK’ to save.
When you return to the staff or child record, the icon will have changed, indicating that a document has been uploaded.
5.b. Uploading Documents from the Documents Tab
 On the Documents Tab click ‘Add Staff (or Child) Document’. You will be taken to the Document Upload Screen.
 Specify the type of document you want to upload.
 For certain Document Types, such as Training, there may be multiple records that the document could be associated with. Select the correct record from the list.

Click ‘Browse’ to find the document you want to upload on your computer.
 Select the document you want to upload, then click ‘Open’. You will be taken back to the document upload screen.
 Now the name of the document will be displayed beside the ‘Browse’ button. Verify that this is the document you meant to upload and click ‘OK’ to save. The document will now appear in the list on the Documents Tab.
5.c. Uploading Documents from the Document Center
 On the Document Center screen, click ‘Add Document’. You will be taken to the Document Upload Screen.
*Please note that you need to indicate whether or not you are uploading a child or a staff document.
 Specify the type of document you want to upload.
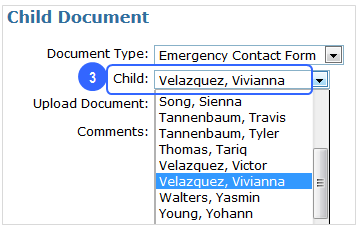
Next, select the child (or staff person) to whom the document should connect.
 Click ‘Browse’ to find the document you want to upload on your computer.
 Select the document you want to upload, then click ‘Open’. You will be taken back to the document upload screen.
 Now the name of the document will be displayed beside the ‘Browse’ button. Verify that this is the document you meant to upload and click ‘OK’ to save.
The document will now appear in the list on the Document Center main screen.
6. Removing or Replacing Documents
- Documents can only be deleted from the Documents Tab or Document Center.
- To replace a document, you must first delete the original document then upload the replacement document.
- Please note that once documents are deleted from ChildWare’s Document Management System they cannot be retrieved.
- You should delete documents only if you are absolutely certain you no longer need them. You may want to save documents from the Document Management System onto your computer or network before deleting them from ChildWare.

To delete a document, click ‘Delete’ in the list on the Documents Tab or Document Center.
7. Document Types
Child Documents
- Assessments:
- Blood Lead Assessment
- Dental Assessment
- Health Assessment
- Hearing Assessment
- Vision Assessment
- Child Service Agreement
- Child Service Report
- Emergency Contact & Consent Form
- Formula Consent
- Photo & Media Release
- Events: (Documents can be associated with all event types)
- Administrative
- CACFP Enrollment Application
- Early Intervention
- Health
- Illness
- Injury
- Observation
- Parent Conference
- Parental Involvement
- Redetermination
- Subsidy Application
- Transition
Staff Documents
- CDA Certificate
- Child Abuse Clearance
- Criminal Background Clearance
- Diploma
- Director’s Credentials
- FBI Clearance
- Health Assessment
- References
- SAC Certificate
- State Teaching Certificate
- Transcripts
- PD Events: (Documents can be associated with all event types)
- PD Plan
- PD Activity Documentation
- Staff Classroom Observation
- Staff Performance Evaluation
- Training Certificates

 The Document Type menu contains many options listed in alphabetical order to help find the document you want to add. After selecting a document type, upload your document (see instructions for uploading files here).
 Click the ‘Add Schedule Period’ button to record an employee’s schedule. Specify the days of the week, begin time, end time, room and activity. If an employee’s hours or room vary from day to day, enter each day’s schedule details separately.